Finally have time to get back and finish my series in how an alpaca (or any fiber) goes from growing it to a garment.
If you did not read Part 1 of the series --
here it is.
I have already discussed:
- Shearing
- Skirting/Sorting/Grading the fiber
- Washing
- Prepping the fiber (we combed the fiber in this case)
Step 5 - Spinning the prepared fiber (in this case - hand-pulled top). For this step, you will need a spinning wheel or a spindle to spin the yarn. While I will not get into all the intracies of spinning in this particular post - I spun this yarn in a 2 ply Heavy Worsted or Aran weight yarn. It came out to 9 WPI (wraps per inch).
 |
First I had to make single (1 ply) . . .
This was done several times
to get enough yardage for the scarf | |
|
|
| | | | |
 |
Then I plyed these two singles together to make
a well balanced yarn |
|
|
|
|
|
| |
|
|
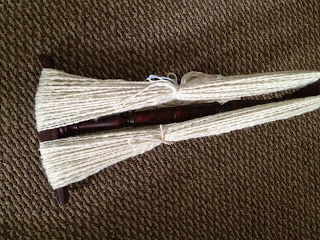 |
| Then I wrapped it on my niddy noddy and tied it to get ready to set the twist |
Step 6 - Setting the twist or setting the yarn is simply getting the yarn wet in warm water, you could also use some dawn if you think it is still dirty, but remember NO agitation. I take the yarn off of the niddy noddy and hold it in the air, if it does not twist on itself, then I know I do not need to weight it. I soak the yarn in warm water for about 10-15 minutes. I squeeze out the excess water (NOT wring) and then wrap it in a towel to get out as much water as possible and then hang it on a hook in my studio. You can also use the neck of a clothes hanger.
 |
| Here is the yarn after the twist is set |
As you can see from the finished yarn (and there were several skeins), that there is a variation in the yarn - it does not look like commercial yarn or yarn from a mill. That is how I like to spin, I like it to look like hand spun yarn.
Step 7 - Knitting the Scarf - you ideally should have picked out your pattern (or created one) prior to spinning the yarn. Sometimes I spin without a project in mind, but the best method is to spin WITH a project in mind. I wrote the patter FIRST, and determined what my WPI and yardage would need to be and then I sat down to spin. Here is the scarf before blocking. It is a Broken Basketweave™ pattern. You can see how the edged are not completely level. Some of this has to do with the hand spun yarn, but most can be taken care of with blocking.
 |
| Here is the scarf BEFORE blocking - the pictures shows both ends placed on top of one another |
Step 8 - Blocking the scarf - blocking is a method that allows the pattern to "come alive", lay flat and get as even as possible. I soak the scarf in warm water for about 10-15 minutes (again you can use dawn or laundry detergent if you would like to wash it). I squeeze out
the excess water (NOT wring) and then wrap it in a towel to get out as
much water as possible. Since this is a scarf and finished was 60 inches long, I used my ironing board as a blocking board. I laid the scarf on the board and fussed with it until it looked all aligned and "blocked" (square/rectangular in this case). You can use pins to set the shape, but I don't for heavy garments such as this . . . but they are essential for drapey shawls etc.
Once the scarf was dry - I did an additional "Steam Set" with my iron to weight it down further and to try to get it all nice and square. Be careful NOT to singe the garment, especially a light color like this one.
Now you can see by the pictures that the scarf is not 100% square and that is due to the nature of the hand spun yarn, and again, I like it like this. If you do not then when you spin, make your yarn more consistent and even with no thick or thin spots.
 |
| Finished scarf after blocking - I LOVE the way it turned out and so did my client ! |
 |
| Close up of the pattern - Dante APPROVES!!! |
Step 9 - Wearing and washing - from time to time - you will want to wash your scarf. Since this particular item is 100% alpaca - you will want to hand wash and dry flat. Blocking may be needed again to "correct" the shape.
Next post - the pattern . . .
stay tuned


